Last updated: June 26, 2020
Use HubSpot's blog tool to create compelling content that educates your audience about your business. Before you get started, be sure to update your blog settings, company branding, and connect your domain.
Create a new blog post
- In your HubSpot account, navigate to Marketing > Website > Blog.
- Use the blog dropdown menu to select the blog for your new post.
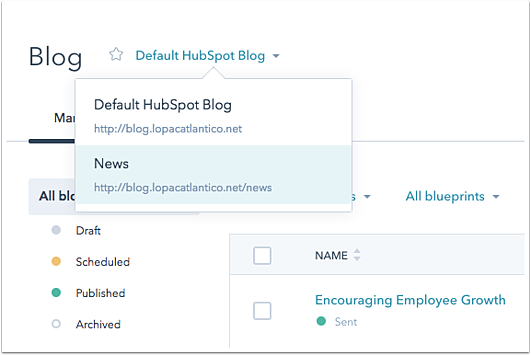
- In the upper right, click Create blog post. Or hover over an existing post and click Edit.
- Choose whether to create a post in draft mode or inline edit mode:
- Select Inline Edit Mode to use the classic WYSIWYG (What you see is what you get) rich text editor.
- Select Draft Mode to focus on written content or upload a Google Doc. This editor removes publishing options from view until you're ready to optimize and publish your post in the inline editor. Learn more about how to work in draft mode.
Edit blog post content
- Hover over the blog post title module and click the pencil icon to enter your blog post title.
- Hover over and click the post body area of the editor. This action will reveal a formatting menu.
- Use this menu to add text, images, and CTA buttons to your post. Learn more about using the rich text editor interface.
- In the post body, place your cursor where you want the preview of your post content to end.
- Click Insert and select Read more separator.
- Click the More handle and drag it into position as needed.
Edit blog post settings
- Click the Settings tab to customize your blog post details to update your post settings:
- Add or edit the blog title. This title appears on your blog content, and in search results. To use a different page title in search results for this blog post:
- Click Customize blog's page title.
- Enter a unique title for your blog post. This title will appear in search results and in title of the web browser used to view your blog post.
- Click the pencil icon to update the URL.
- Associate the post with a campaign.
- Set a featured image.
- Add a blog author.
- Add blog tags.
- Add or edit the blog title. This title appears on your blog content, and in search results. To use a different page title in search results for this blog post:
- Click Advanced options to expand additional options:
- Manage your blog template. HubSpot blog templates are coded, so any changes should be made with an experienced web developer. Learn more about the default blog template markup.
- Manage your blog email notifications.
- Customize the canonical URL if you have duplicate content.
Review and optimize your blog post
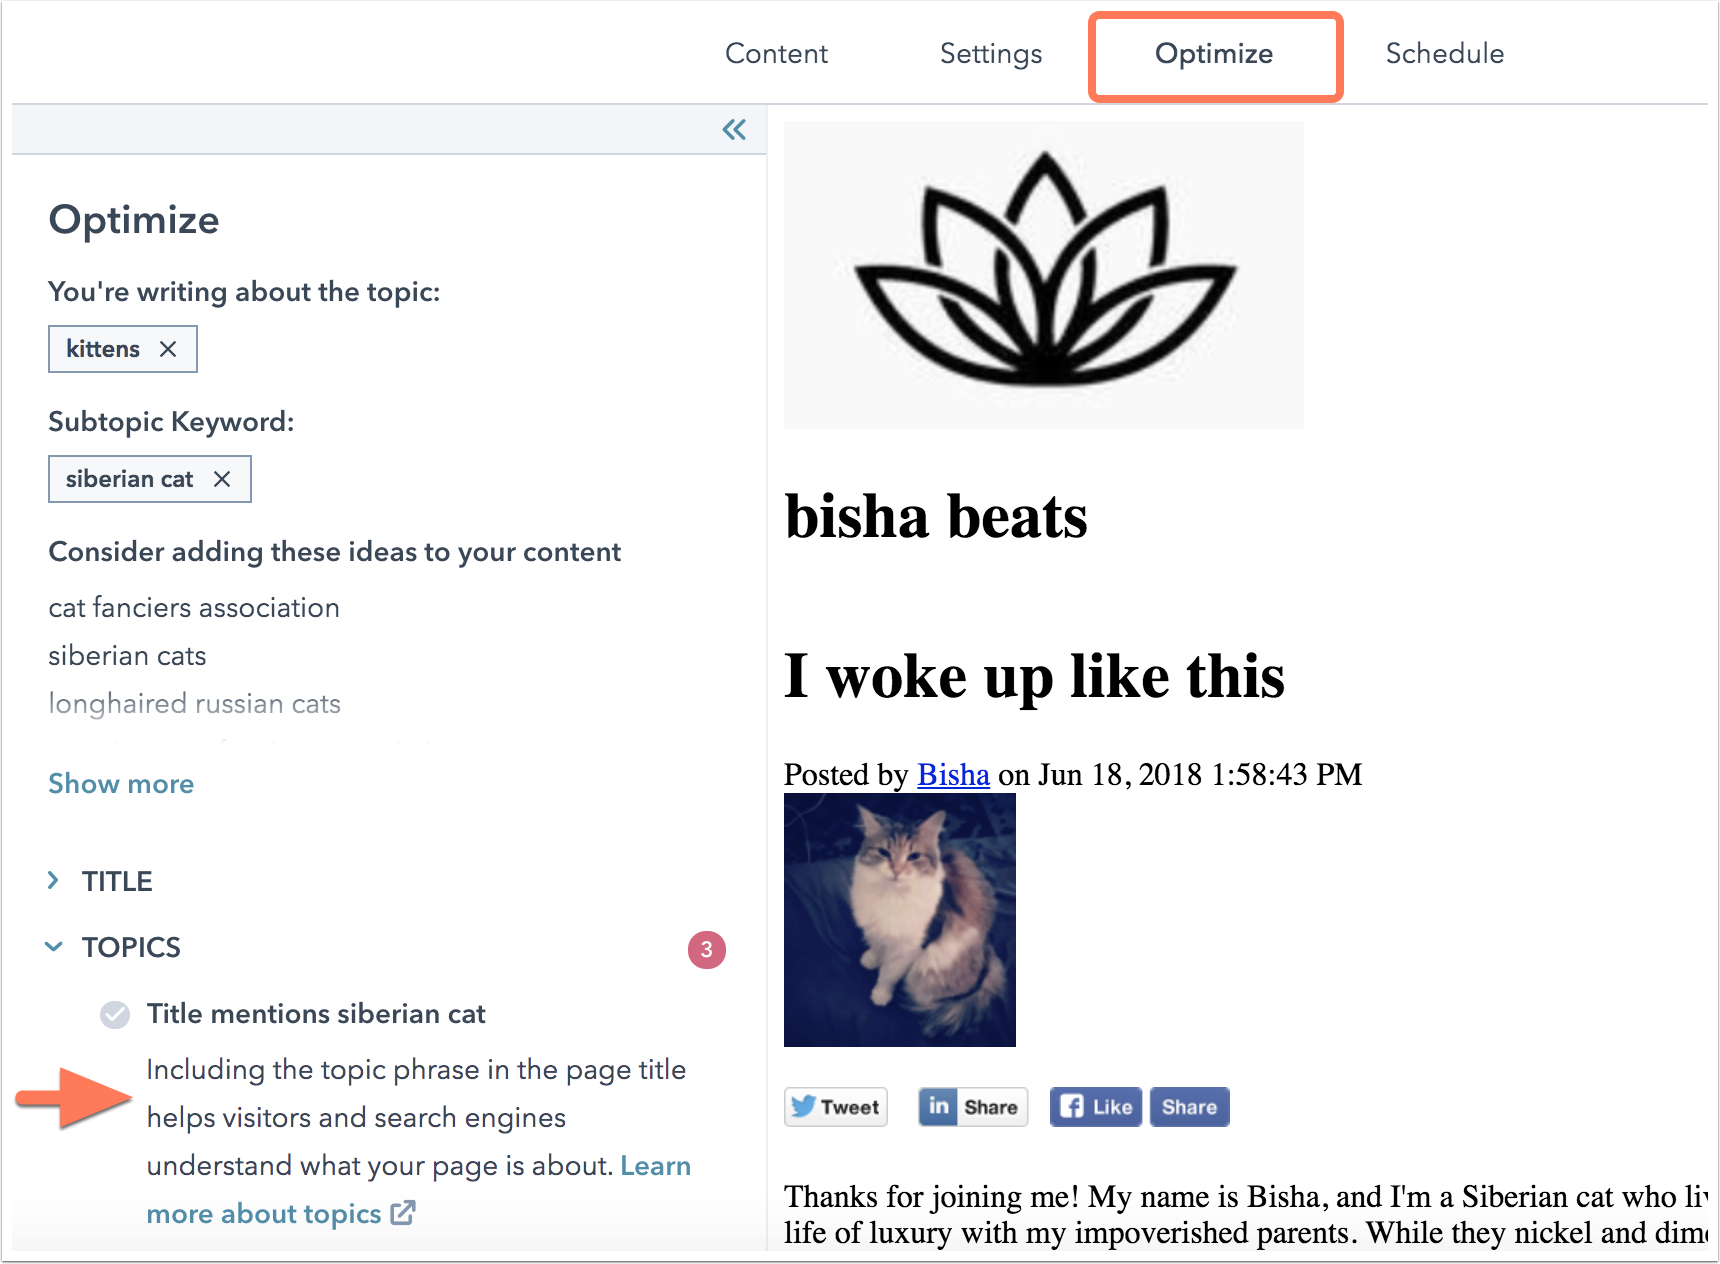
Use the optimize tool in the editor to review suggestions to improve your content for SEO best practices. To organize your overall content strategy, attach your content to an SEO topic.- At the top of the editor, click Optimize.
- You'll see groups of related SEO tips open in the left panel. Any items that needs action will have a red circle with the number of items that need to be addressed.
- Click a grouping to expand more details:
- SEO recommendations with a green checkmark have been completed.
- SEO recommendations with a grey checkmark need to be completed.
Preview your blog post
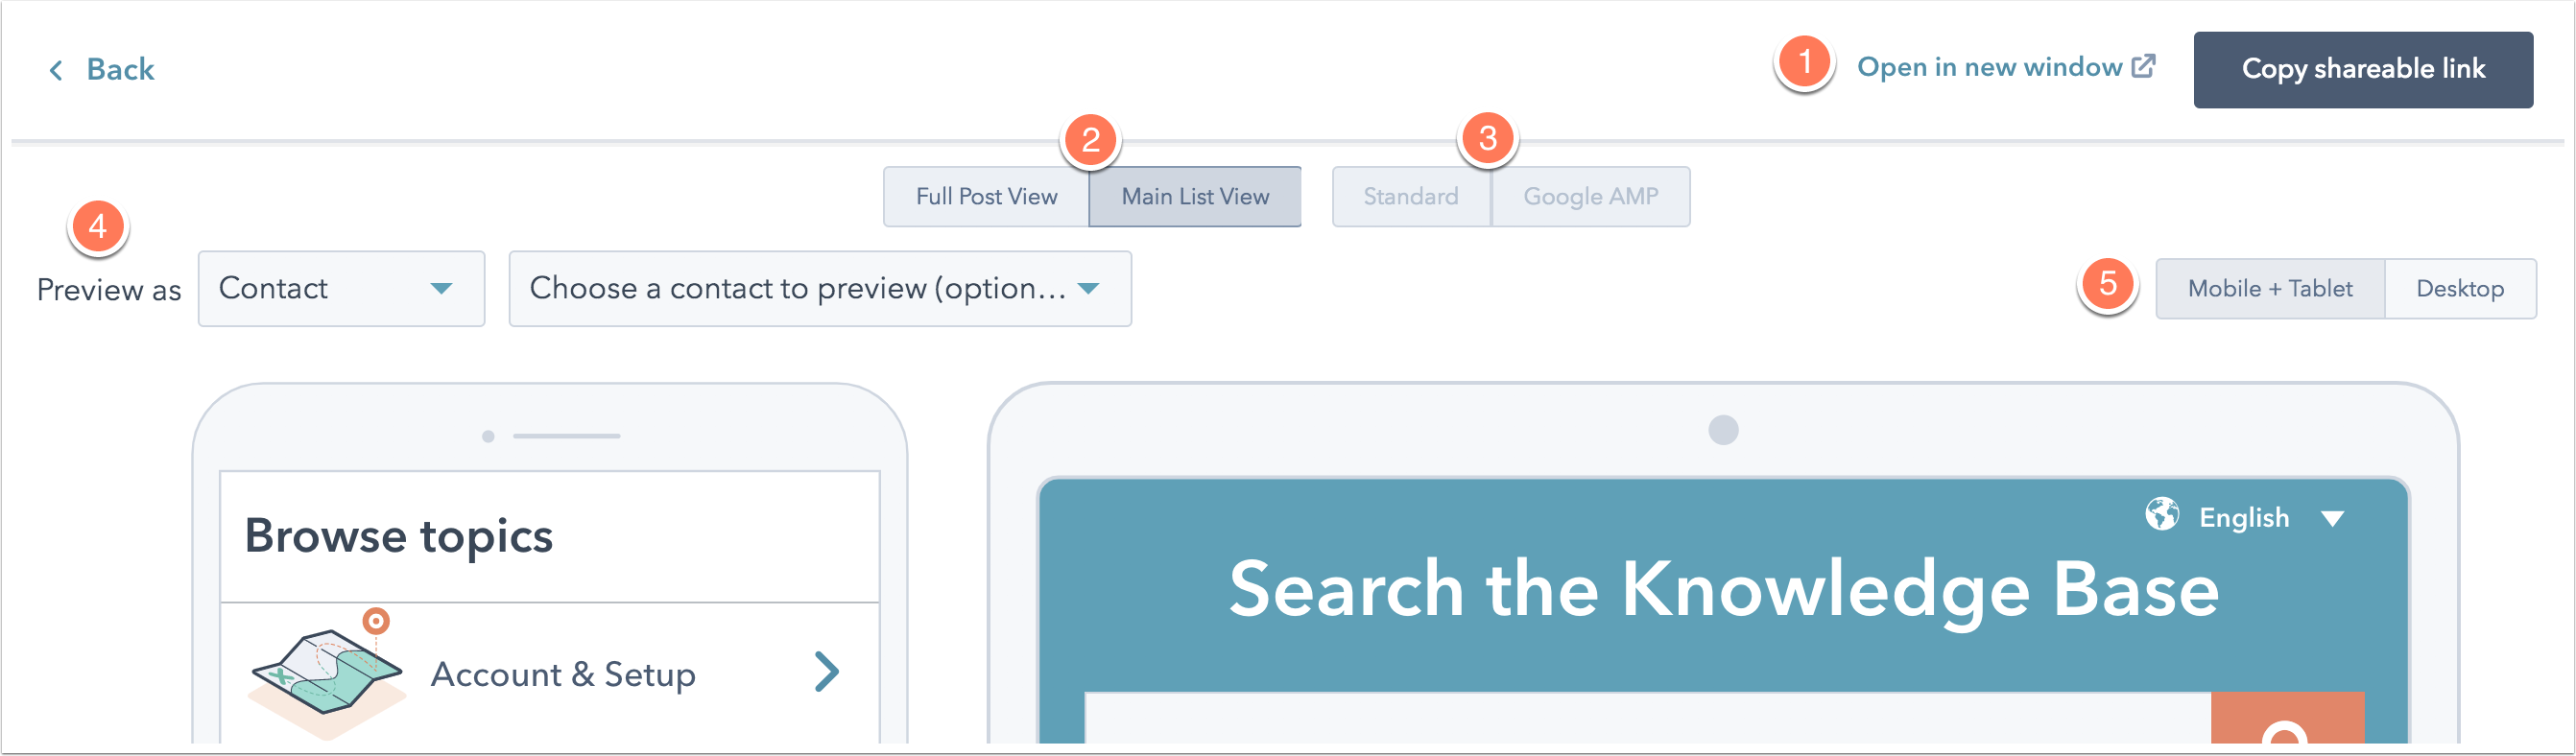
In the upper right, click Preview to see how your blog post will appear to visitors.
- Device preview: click Open in new window to see a live preview of your blog post in a new tab in your browser. This preview link will work before your post is actually published. Click Copy shareable link to copy the link to your clipboard to share it with your team.
- Click Full Post View to preview the specific blog post you're editing. Click Main List View to preview your blog's homepage.
- If you've enabled Accelerated Mobile Pages (AMP) for your blog post, click Google AMP to see how your blog will appear on a mobile device.
- Smart preview: click the Preview as dropdown menu to preview how your blog post will appear for different contacts in your database.
- Select a contact to preview how personalization will appear based on that particular contact's property values. Click the second dropdown menu to select a specific contact from your database.
- Select a smart rule to preview how smart content on your blog will appear to contacts who meet its criteria. Click the second dropdown menu to select a specific smart rule to preview.
- Device type: click Mobile + Tablet to see a live preview of your page on a phone or tablet device. Click Desktop to see a preview of how your page will appear on a web browser.
Publish or schedule your blog post
After you've added your content, optimized it for search engines, and previewed how it will look to visitors, you're ready to publish your blog post.
- Click the Publish or schedule tab and select Publish now to publish immediately, or Schedule for later to publish this post at a future date and time.
- If there are any required items missing from your page, you'll see an alert in the upper right corner of the Publish button.
- Once you've finished completing all the required items for your blog post, click Publish.